Is Your Classroom Ready? How to Make a Classroom Banner...
I always find that I am a bit antsy around this time in the summer. Our vacation has come and gone, July is coming to an end, and school supply deals are in full swing. I have been to my classroom twice so far, once last weekend to organize after the summer clean-up crew, and today to drop off some supplies with my own kiddos.
Floors are waxed, desks are in place, and it is starting to look like a classroom that is ready for students again. I have made some changes to EVERYTHING based on my plan to teach the Daily 5/Daily 3 this school year, so I feel like my brain will not turn off.
My friend Maria, who I have gotten to spend a great deal more time with this summer because my family joined her gym, has inspired me in all kinds of ways through our daily catch-up sessions. Mainly we are getting in a few words here and there as we are working out or chasing small children around the pool, but she has been a wealth of ideas, nonetheless. She has made me feel less antsy, and more excited about the year to come.
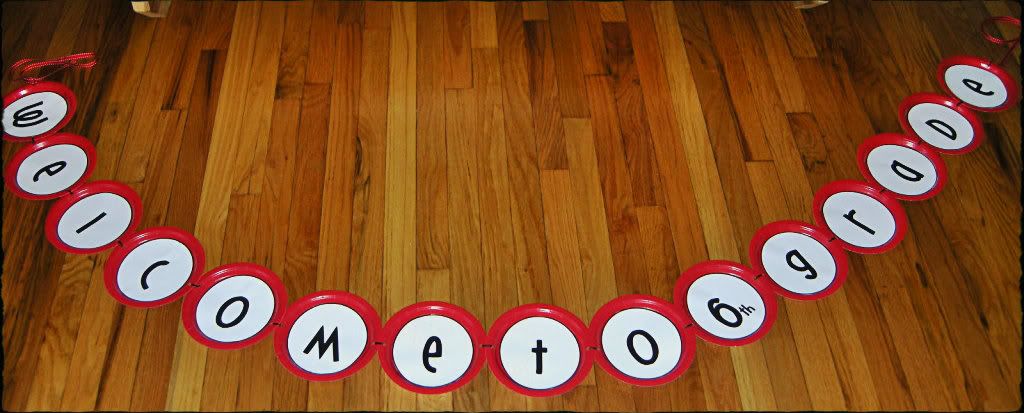
A few weeks back she made a cute banner to display in her classroom. Be sure to check out her banner on her blog at http://curiousfirsties.blogspot.com/. I was inspired by her idea and decided to follow suit. Surely there is nothing more welcoming, aside from a kind, friendly, and smiling teacher, than a welcome sign!
Because I had scotch tape on hand and ribbon from another craft project, it only cost me $1.07 to make the banner. You can get incredibly creative with plate design and color fill on the letters, of course. I chose to go very simple.
If you are up for tackling your own banner, I have included a quick "how-to" to make the letters on Microsoft Publisher:
- On the Start menu, click on Microsoft Publisher
- Click on Blank Print Publication
- Click on Quick Publication Options-a blank page will be visible
- To the left of the menu you will see shapes-I used the oval-Click on it
- Click in the middle of your page and you will have a small shape
- Size the shape how large/small you want it-I made mine roughly 6.062 H by 5.438 W
- Double click on your shape
- You can change the outline color of your shape, make the outline thicker, etc.
- Under the style tab, I made my circle outline 6pt.
- Where it says Color at the top, you can fill in the space with color if you choose-I did not.
- Right click and you can Add Text
- Center your text
- Depending on the font you select you will need to play with size-I used a font called "wish I were taller" and needed to make it 200 and bold
- Print your creation and put your banner together!
Good luck as you are getting your classroom in order. I know each little task I accomplish as I head into August, makes me feel a little less overwhelmed about having it all together when students walk through the classroom door on that very first day of the school year!
Labels: Classroom Banner, Organization


2 Comments:
Thanks for the shout out my FABULOUS friend! I LOVE our workouts (even though I die each time) and moments to catch up without having to chase a little ones! :)
LOVE, LOVE, LOVE your banner!!!!
ps.. I bought more plates for more banner fun!
Mrs. Erin!!!!
I nominated you for an award. Come over and pick it up like you'll pick up that barbell tomorrow. hahahaha
Maria
http://curiousfirsties.blogspot.com
Post a Comment
Subscribe to Post Comments [Atom]
<< Home